Dependency Injection in JavaFX


Introduction
Dependency Injection is a design pattern that is widely employed in the development of modern software. It promotes software quality by helping to ensure that program components are loosely coupled and also by making it possible to test components in isolation. It is very common to see Dependency Injection used in Java server-side software but it can be equally useful in GUI applications such as those developed with JavaFX. In this article I show how Dependency Injection can be used in JavaFX.
VocabHunter
This article is based on the experience gained from a project to rework the Dependency Injection in VocabHunter, a tool for learners of foreign languages. VocabHunter is Open Source and all of the source code is available on GitHub. The ideas and techniques presented here have all been applied in the project and each time I refer to source code, I provide links to that code in GitHub. As VocabHunter is a live project under active development, I’ve fixed all of the links to version 1.0.18 to ensure that they will continue to work even as the project evolves. I encourage you to download it and experiment and feel free to make use of the ideas in your own projects!
Two Sources of Components
When you start working with Dependency Injection in a JavaFX application you soon hit a problem: there are two sources of components. The first is the Dependency Injection system itself, be it PicoContainer, Guice or any one of the many alternatives that are now available for Java. The second source of components is JavaFX itself. If you load an FXML file, JavaFX will instantiate all of the buttons, menus and whatever else you may have described in the markup and then inject those components for you into your controller. But what if you want a controller that receives by Dependency Injection both your components and those created by JavaFX? Then you will need something that brings these two worlds together.
Gluon Ignite and Google Guice
Gluon Ignite is an Open Source tool that solves the problem of the two sources of components. It lets you define GUI controllers that combine components that come from your Dependency Injection system with those created by JavaFX when you load an FXML file. At the time of writing, Ignite offers support for the following three Dependency Injection frameworks:
Prior to release 1.0.18 of VocabHunter and my rework of the Dependency Injection, I was using PicoContainer throughout. However, given that this is not one of the frameworks currently supported by Ignite I decided to make the switch to Guice. It seems to be a capable, lightweight and widely-used framework and I think it has proved to be a good choice.
The ‘About’ Dialogue
Let’s take a look at an example from VocabHunter of how Dependency Injection is used. The ‘About’ dialogue is one of the simplest parts of the user interface and shows some basic information about the program. It also includes a pair of hyperlink components, a close button and a label with the system version number:
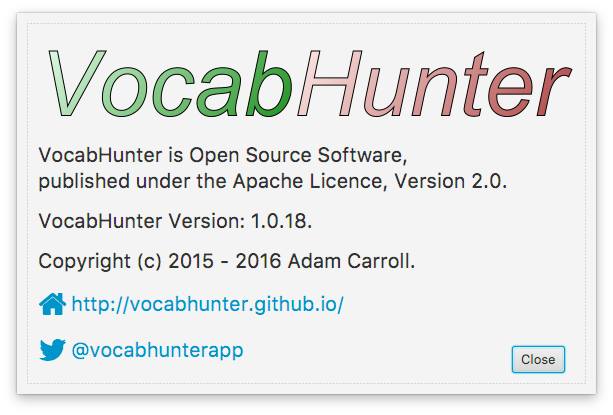
When the user clicks on one of the hyperlinks, VocabHunter calls an internal component, the WebPageTool, to handle the request to open the web page. The layout of the dialogue is all described in an FXML file, about.fxml, and this is loaded by JavaFX to instantiate all of the components. This means that we immediately have the problem of the two sources of components:
- JavaFX itself creates the GUI components (hyperlinks, close button etc.).
- The Dependency Injection mechanism supplies the
WebPageTool.
In the following sections I’ll show how this problem can be solved.
Implementing the Dialogue
The ‘About’ dialogue is made available to the rest of the system as a component: AboutHandler. The class has a single public method, show(), that displays the dialogue and waits for the user to close it. The class itself is defined as a singleton which is to say that the same instance is shared throughout the system. The basic class outline is thus as follows:
@Singleton
public class AboutHandler {
    ...
    public void show() {
        ...
    }
    ...
}
When the show() method is called, the FXML is loaded using an FXMLLoader. FXMLLoader is a standard class that ships as part of JavaFX. The key “trick” here is to obtain the FXMLLoader via Dependency Injection:
private final Provider<FXMLLoader> loaderProvider;

@Inject
public AboutHandler(final Provider<FXMLLoader> loaderProvider) {
    this.loaderProvider = loaderProvider;
}

public void show() {
    ...
    FXMLLoader loader = loaderProvider.get();
    ...
}
By using a Provider we ensure that each time we call get() we get a brand new FXMLLoader which can then be used to create a brand new set of view components and a new instance of the controller.
After obtaining the FXMLLoader, the next two lines of show() are as follows:
Parent root = ViewFxml.ABOUT.loadNode(loader);
AboutController controller = loader.getController();
The first of these two lines uses the utility ViewFxml (described in the following section) to initialise the FXMLLoader and to get the root-level view component (a JavaFX Pane in this case). The second line obtains the controller, an instance of AboutController. And through the magic of Ignite, Guice and JavaFX this controller has all of the view components along with the WebPageTool injected into it!
Loading the FXML
Like many JavaFX projects, VocabHunter uses FXML to describe the views. To avoid embedding strings with the FXML file names around the code, a single Java Enum, ViewFxml, is defined with all of the views. This Enum also contains a utility method, loadNode():
public <T> T loadNode(final FXMLLoader loader) {
    try {
        loader.setLocation(getClass().getResource("/" + name));

        return loader.load();
    } catch (final IOException e) {
        throw new VocabHunterException(
            String.format("Unable to load FXML '%s'", name), e);
    }
}
As you can see, the method does very little other than initialise the FXMLLoader and then load the view components. The call to setLocation() is important: remember, the FXMLLoader is a new instance obtained through a Provider and must be initialised with the location of the FXML file.
I found it convenient to manage the FXML this way using a Java Enum. As ever, there is more than one way to achieve the same effect and you may prefer to do this differently in your project, particularly if for example you have a large number of FXML files that you want to group by type.
The JavaFX Controller
The remaining piece of the puzzle for the ‘About’ dialogue is the controller itself, AboutController. The FXML file about.fxml has a reference to the controller class to enable JavaFX to know which class to instantiate and where to inject the close button and the other GUI components:
<Pane fx:id="aboutDialogue"
      fx:controller="io.github.vocabhunter.gui.controller.AboutController">
   ...
</Pane>
The ‘About’ dialogue is very simple and this is reflected in the simplicity of the AboutController. Here you can see that the problem of the two sources of components is resolved. We are able to inject the WebPageTool along with the GUI components without any problems:
public class AboutController {
    private final WebPageTool webPageTool;

    public Button buttonClose;

    public Hyperlink linkWebsite;

    public Hyperlink linkTwitter;

    public Label labelVersion;

    @Inject
    public AboutController(final WebPageTool webPageTool) {
        this.webPageTool = webPageTool;
    }

    ...
}
In the above code, WebPageTool is provided by Guice whereas the other fields are injected by JavaFX. By using Ignite we have solved the problem of the two sources of components.
Starting the Application
Surprising though it might seem, there is only one place in the VocabHunter Java source code that actually needs to refer directly to Ignite and that is the executable class, VocabHunterGuiExecutable. This is the class that contains the main() method for running the program. But this class serves a dual role. It is also the main entry point for the automated GUI tests.
The key to understanding this class is the following line:
private final GuiceContext context = new GuiceContext(this, () -> modules);
Here we define everything that will be needed to start up the Dependency Injection mechanism. The this reference is the “context root”. The variable modules is a collection of Guice modules that define all of the components that will be injected. By defining the context root like this it is then possible to inject a component directly into the executable:
@Inject
private VocabHunterGui vocabHunterGui;
VocabHunterGui is the top-level component that starts up the entire VocabHunter GUI. It has a single public start() method that works all of the magic and by this simple bit of Dependency Injection, the executable is able to run the program.
Most of the components are defined implicitly using JSR-330 annotations. For example, VocabHunterGui is marked with @Singleton but is not explicitly listed in a Guice module:
@Singleton
public class VocabHunterGui {
    ...
}
Before we can use the reference to VocabHunterGui, one thing remains to be done. Ignite must be initialised. Here this is done in the start() method of VocabHunterGuiExecutable:
@Override
public void start(final Stage stage) {
    ...
    context.init();
    ...
}
Once the call to init() has been made, VocabHunterGui and all the other components can be used.
Guice Modules
Certain components are defined in Guice modules and this is in fact the only place other than the executable class itself where we need to use Guice-specific classes. Just as the direct use of Ignite in VocabHunter is intentionally limited, so also is the direct use of Guice. This helps to make the implementation more future-proof.
To see the Guice module definition in action, take a look at CoreGuiModule where we define Analyser, the component at the heart of VocabHunter that analyses text documents:
public class CoreGuiModule extends AbstractModule {
    @Override
    protected void configure() {
        bind(Analyser.class).to(SimpleAnalyser.class);
        ...
    }
}
Returning to the executable class VocabHunterGuiExecutable you can see the collection of modules and the Ignite context where they are used:
private static Collection<Module> modules;

private final GuiceContext context = new GuiceContext(this, () -> modules);
At first glance it may seem a bit odd to define the modules in a static member field. The reason for doing this relates to the fact that VocabHunterGuiExecutable actually serves two closely related purposes:
- It is the executable for running the VocabHunter GUI.
- It is the entry point for the automated GUI tests.
In these two cases the modules that are used are slightly different. For testing purposes some components are replaced. For example the WebPageTool mentioned earlier that the ‘About’ dialogue uses when opening a web page is replaced in the test with something that simply records the page that is to be opened so that it can be verified later. To make this work there is a static method setModules() called from the main() method of the executable and separately from the test to define the respective sets of modules to be used. The set of modules passed in main() are those for the “real” VocabHunter and those passed in the test are the slightly modified set, used for testing. By making setModules() a static method, the modules can be defined before VocabHunterGuiExecutable is instantiated either in the “real” system or in the automated GUI tests.
Including the Framework
The VocabHunter project is built with Gradle. Ignite is added to the build.gradle file of the gui subproject as follows:
dependencies {
    compile 'com.gluonhq:ignite-guice:1.0.1'
    ...
}
As you can see, the Ignite library name, ignite-guice, makes reference to Guice. This is because there is a separate Ignite bundle for each of the supported Dependency Injection frameworks. Including ignite-guice pulls in the Guice library.
As far as possible I’ve tried to avoid using framework-specific classes and annotations. Guice and by extension Ignite support the JSR-330 standard Dependency Injection annotations and interfaces and I’ve used these throughout. I do this to try to avoid being tied in to Guice so that I can swap it out in the future if needs be.
In the core Gradle subproject I need to use Dependency Injection annotations but have no need for either Guice or Ignite so I just declare a Gradle dependency on the JSR-330 library in the build.gradle:
dependencies {
    compile 'javax.inject:javax.inject:1'
    ...
}
Automated GUI Testing
Dependency Injection makes it easier to write unit tests as components can be tested in isolation. It is common to use mocks for the dependencies of the component under test and these can then be injected into the component by the test itself. Tools such as Mockito are a great help with this. In addition to good unit tests, the quality of a JavaFX application will benefit from having automated GUI tests. Dependency Injection also helps here as you can swap in test components where it is undesirable or impractical to use the real thing.
TestFX is a framework for automating JavaFX GUI tests. If you’d like to know more about this, you might be interested in the guide I wrote: User Interface Testing with TestFX. The article was written before I made the change in VocabHunter from PicoContainer to Ignite and Guice but the idea remains the same. To get a flavour of what the automated GUI test looks like in action, take a look at the video I made to go with the article:

Alternative Approaches
As is always the case in software, the approach to Dependency Injection in JavaFX that I describe here is just one of many possible alternatives. You may well find that an alternative approach works better in your project. That said, I’m pleased with the results of the project to switch VocabHunter to Ignite and Guice. I particularly like the way that I can keep the two frameworks “at arm’s length” in the sense that in general the code just refers to JSR-330 annotations and interfaces. This should make it possible to change to an alternate framework in the future if needs be.
Ignite itself offers support not just for Guice but also for Spring and Dagger. I think it might be interesting in the future to look at Dagger which promises to be fast and lightweight. Also, Ignite isn’t the only JavaFX-focussed Dependency Injection framework out there. I haven’t tried it but afterburner.fx appears to be a lean framework that takes a slightly different approach and might be worth a look. Frameworks such as Griffon also include Dependency Injection support.
Finally, you can always do this yourself by taking your preferred Dependency Injection mechanism and adding JavaFX support. Take a look at this article on the Bekwam Blog for a good example of how this can be done in the case of Guice.
Final Words
If you’re not already using Dependency Injection in your JavaFX project, I suggest you take a serious look at doing so. It really does help to make your code more testable and lightly coupled. I’ve found that Gluon Ignite and Google Guice seem to work well for me and I hope that this post helps you if you choose to take this or another approach.
Finally, I should mention that any mistakes here are all my own. If you spot a problem with the implementation in VocabHunter, give me a shout or even better fix it and send me a pull request! VocabHunter is Open Source and you can keep up to date with all developments in the project by following @vocabhunterapp on Twitter and by forking the project on GitHub.
Related Articles
- Read (Almost) Any Document in Java
- Installable Java Apps with jpackage
- Building a JavaFX Search Bar
- Migrating to JUnit 5
- Open Source & Secret Santa with Santulator (King Tech Blog)
- User Interface Testing with TestFX
- How JavaFX was used to build a desktop application (King Tech Blog)
- VocabHunter – A tool for learners of foreign languages (King Tech Blog)